
The 10 steps to change the CSS of your website without knowing how to code
Follow this guide to make simple alterations to any element you want. No, you don’t need a different theme.
If you have a website and you want to tweak the appearance of an element, but:
- The editor / customizer has no such option
- You don’t want to change the entire theme
- You don’t know HTML or CSS, and don’t have time to study programming
Then you’re probably going to need a professional developer.
However, there’s a chance that the tweak is so simple, that a non-developer could perform it easily.
This article will guide you through simple changes on any website.
Warning: There is no 100% guarantee you will be able to perform the changes. But I’m certain that these steps will help with a lot of these simple tasks.
The plan
Here’s a few definitions, before we start. Don’t worry if you don’t understand anything yet.
In order to edit an HTML element’s style, we add a new rule on the website’s CSS files. In its most basic version, this rule has a selector that describes the element (or a group of elements), and a property / value pair.
Here’s an example:
.btn {
    margin-bottom: 10px;
}
The selector is btn , the property is margin-bottom and the value is 10px .
Our plan is to figure out the exact element we want changed, determine the right selector, and the right property and value. Then, paste this into our website’s CSS editor or file.
The steps
Important note 1: As this is a complicated process, you need to closely follow the steps described. Always read the details under each step first. You can refresh your site’s page to reset all changes.
Important note 2: Always look inside the page when you check the result of your changes. There might be other elements affected.
First, we’re going to see if the element we want to change already has a rule with a property that describes what we want.
A property is something like color , background , font-size etc.
For example, if we want to change the color of a text, we’ll try to find the HTML element corresponding to the text, and find the part where the color is currently defined.
Open your browser (I’m using Chrome for this) and visit your website.
Step 1: Inspect the element in DevTools
- Locate the element you want to change,
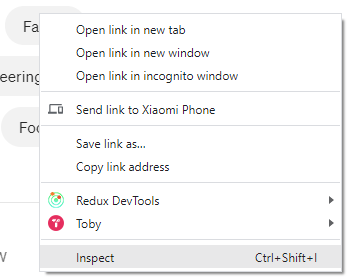
- Right click on its exact center,
- Click on Inspect,
- Take note of the line that is highlighted on the DevTools (the pink part after the
<), - Keep the mouse on it, look inside the page where you clicked, and if the highlighted area on the page is too large and has other irrelevant elements to the one you wanted, go to Step 5A
In detail:
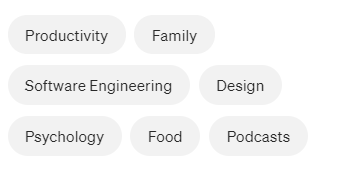
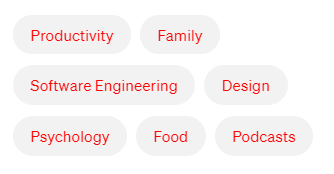
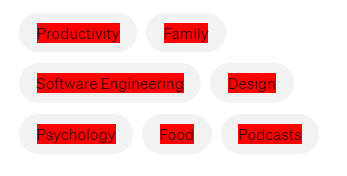
So find the element (here, it’s a tag with the text “Family” and we want to change its background color), right click on it, and hit Inspect:
You’ll see the Chrome DevTools opening:
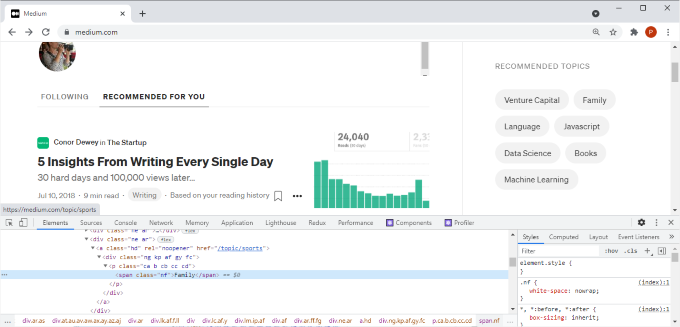
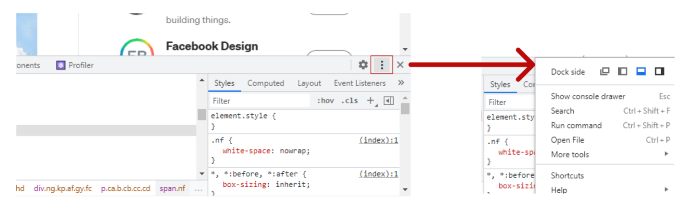
Tip: The exact location might vary. To move the DevTools around, click on the three dots on the top right, and select a position.
Then, look at the line highlighted in the DevTools (in this case it’s a span).

Look at what gets highlighted on the page:

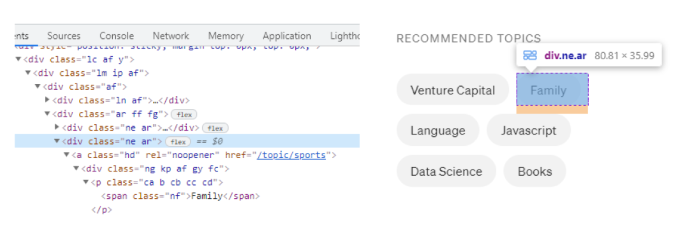
At this point, if the selected (blue) area you see inside the page is too large and includes completely irrelevant elements, go to step 5A. Here’s what that case would look like (the “RECOMMENDED TOPICS” title is irrelevant).

Step 2: Look at the Elements tab for relevant rules
- On the Elements tab of the DevTools, try to locate a rule (block) with a property (in our example,
background) and value (e.g.gray) that looks like the one we want to change, - Read some info on the next step even if you find nothing.
The purpose of this step is to find a property named like what we want to change.
So look at the Elements tab and scroll down if you need to.
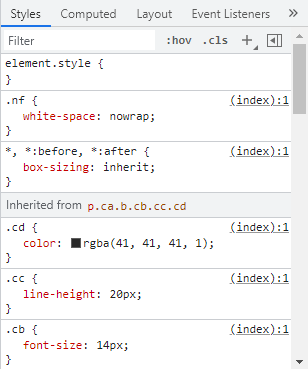
Here, we see a few rules, including a color property. However, nothing that looks like “background”.
But we have to be sure.
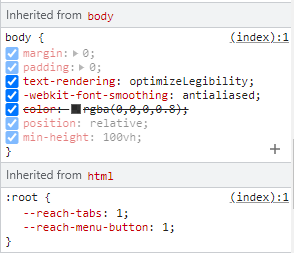
Tip: If you scroll down the rules, you’ll get to a point where it says “Inherited from body ” or “Inherited from html”. These are rules that are probably not going to help, because they apply to all of the elements in the entire page.
You might see nothing that is even close to what you want. Try a bit more on Step 3.
Step 3: Edit existing properties to find the right one
- On the DevTools Elements tab, go to a property you found in the previous step,
- Play around with its value (e.g.
rgb(0,0,0),10px,inherit) by clicking on it and typing different values, opening the color picker and changing colors, or erasing their content and picking a different value from the autocomplete, - Repeat for the other properties if needed,
- If you found nothing in the previous step, read the tips below,
- If nothing works, go to the next step but reset the value you changed first
The purpose of this step is to try different properties and values depending on what we want to change.
If you have no idea what kind of property you might want to pick, here’s a few examples of basic properties that might be relevant to the style you want to alter:
colorfor the text colorbackgroundorbackground-colorfont-sizewidthandheightmarginandpaddingfor spacing around the elementdisplayfor the way the element and its children are shown (or hidden)z-indexas a priority to determine which element is on top on (closest to you)positionis how it gets placed in relation to the parent or the screenborderaround the box of the elementbox-shadow
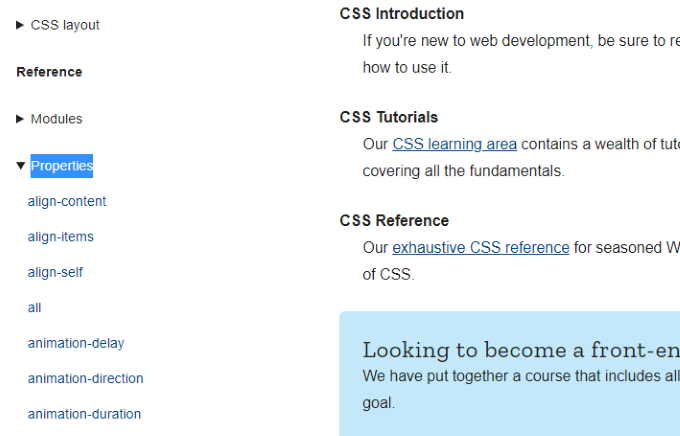
If you need help with the properties and values, visit the MDN Web Docs, click on “Properties” under “Reference” on the sidebar, click on the chosen property’s name, and read about it.
Also, you can always search “css how to change…” on Google.
Here, I decided to try and change the color , since it’s the only property that looks similar to what I want:
Let’s look for the effect (look at the entire page because other elements might be affected too, and you might not want that).
If I wanted to change the color of all the tags’ text, I would have succeeded in finding the right element and rule. In that case, go to step 6.
If the change did correctly happen, but more elements were affected, without us wanting to, we probably need to alter a different element. But first, change back to the previous value, the one that was set initially. If you can’t, you need to refresh the page and start over from step 1 (right click + Inspect + possibly get back to the element we’re at). Then keep going to the next step either way.
If I wanted to change the color of the background, this step has not helped in this example. Perhaps the rule is not defined yet, so we can try creating it ourselves.
Step 4A (conditional): If there’s no relevant property already defined, or if other elements that we don’t want, were affected
- Click inside
element.style(top block) on the Elements tab, - Type a relevant property name (e.g.
background-color) - or the one you possibly already found but affected other elements, - Hit “TAB”,
- Give a value based on the previous step,
- Check the results on the page
The purpose of this step is to try creating the property on our own, just for the one element.

Tip: If you make a mistake, click on the new property’s name, erase the content, and click anywhere outside.
Here’s what it looks like now (notice I’ve reset the text color to its previous state).
If this attempt failed to give me the result I wanted (which in this case is true), I need to 1) perhaps try a different property (check the above step for tips) or 2) as a last resort try an entirely different HTML element (in this case, go to step 5A to find out more elements).
However, If I wanted to alter only the immediate part surrounding the text, it would have been a success in this example. In this case, I need to create an actual rule, because element.style is just for the DevTools and can’t be carried over to the website’s code. Let’s assume that’s what we wanted.
DevTools have a helpful button that adds a new block and automatically gives you a selector.
Step 4B (conditional): If 4A was a success, create a new rule
- In the DevTools Elements tab, click on the “+” button on the right of “.cls”,
- Hit “TAB”,
- Type in the property and value from
element.style, - Delete it from
element.style(read the tip above - click the property name, erase it, click elsewhere), - Confirm the result
The purpose of this step is to create a new block with a proper selector, because element.style applies only inside DevTools.
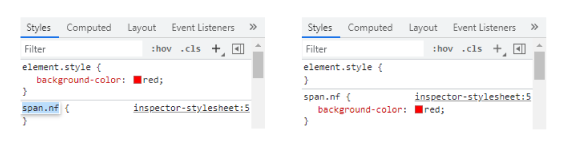
What happens here, is the DevTools tries to find a selector (here it’s span.fn).
Here’s what I’d see in this case:
If this is what I wanted and this step was a success, then I have the new rule that works for me. In this case, go to Step 6 to move on to the final stage.
In case this failed, I can look for a solution on a different element.
So let’s assume the previous steps were not a success.
Here’s where it gets a bit tricky.
The DevTools initially highlight the element you right clicked on, but it might not always be the one you want to style differently. Here’s an example, where I want to change the background color:
When I right click on the “Family” tag, the DevTools show this:
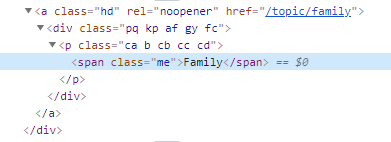
Notice that the blue background is on the span line.
When I hover my mouse over this line on the DevTools, I see it corresponds to this on the page, as it gets highlighted:
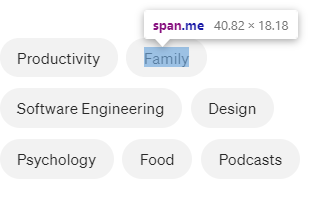
That’s not going to help, because it selects the inner text, and not the area around it. And, as we said, we want to change the surrounding color.
Here’s how to be (almost) sure the highlighted line on the DevTools is the one you want.
Step 5A (conditional): If the previous steps for the initial element failed, find other elements
- On DevTools, click on the highlighted line / tag you initially selected to inspect (e.g.
span), - Move the mouse inside DevTools, upwards. Keep doing that while looking inside the page,
- Do not stop until you reach the biggest possible highlighted (blue) area inside the page, that definitely includes the HTML element you want to alter - but no irrelevant elements,
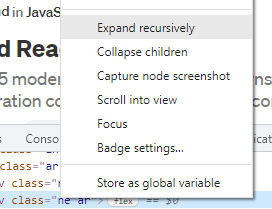
- Right click on the DevTools line of that optimal element,
- Hit Expand recursively
We’re looking for the best possible match, out of the ones around our initial element.
So the final, upper element to right click on, is:
- The biggest possible in the page (size of the blue highlighted area), out of the ones I try
- Only containing the element I want to change, and no other ones
Here’s what hovering upwards looks like here (I don’t right click here):

If you notice what happens, I stop when the previous element “Venture Capital” gets highlighted, and I go back to the largest possible parent of the element I want (“Family”).
This is the line I right clicked on finally. The area or one of its children must be the element I need to change:
And expand (it might have no effect):
Step 5B (conditional): Continuing effort to find the right element, pick some possible matches
- Starting from the top one you right clicked on, slowly hover downwards over all the elements in the DevTools (including the ones that possibly just opened), all the way to the initial one,
- Keep looking inside the page,
- Note the ones that best “fit” the desired element depending on the change you want to make
We need a bit of common sense in this.
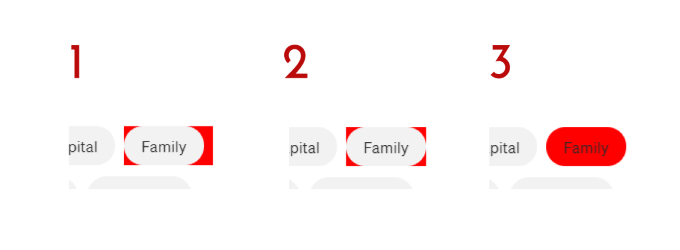
Here’s the only five elements in this case, top to bottom:
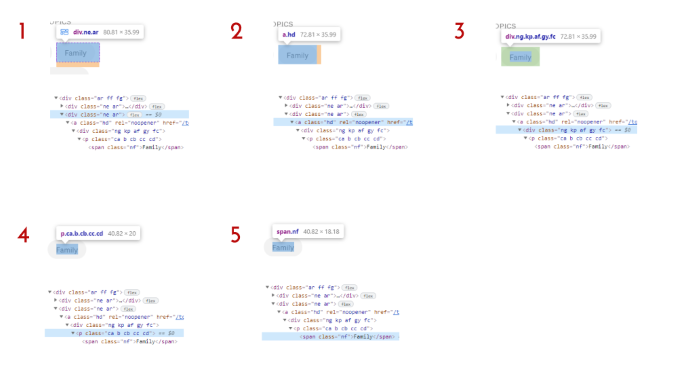
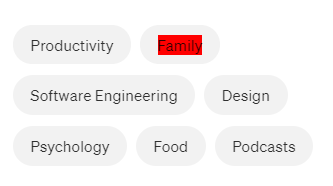
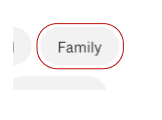
If you remember, this is the background we want to change (right inside the red outline):
As you scroll up and down the elements of interest, it’s obvious that #1-3 are more fitting, while #4-5 do not highlight the area well.
Tip: You’ll see padding (green) and margin (orange) areas around elements, but we must both ignore and include these when trying to pick the best fit. There’s no easy way to tell if they should be excluded or included right now.
It’s OK if you can’t rule out any.
Now that we found the best fits for the element we want, let’s try finding the right one.
Step 5C (conditional): From the noted suitable elements, repeat the same steps as you did for the initial one
- Repeat the steps from Step 2 to Step 4B for each of the possible elements from the previous step,
- Stop when you figure out the right element and rule, or when you’ve run out of options
The purpose of this step is to try changing properties or creating new ones for every one of the possibilities, assuming one of them is the one where the style should be applied.
In my example, I try with element #1 and #2 but I can’t find a similar property and adding background produces a wrong result.
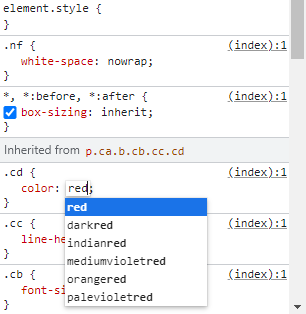
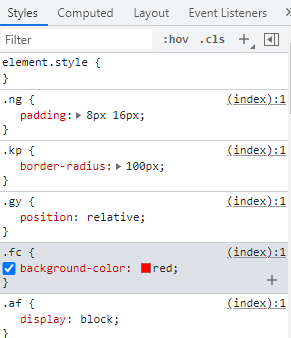
However, on element #3 I see this:
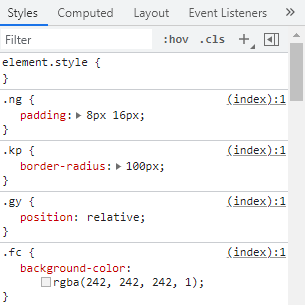
This is interesting, because there’s a property named background-color which sounds like what I want, plus there’s a box with a color very similar to what I see on the page.
I went through the previous steps. Elements #1 and #2 don’t have this property, so I tried adding it. I also tried altering the existing (gray colored) rule for #3. This is what I see for each case:
It’s obvious that changing this rule on #3 helped:
This means that you’ve found the right element, and the right property.
If you didn’t, it is possible that the solution to the problem is not simple after all.
In that case, there’s not much you can do and you have to find a developer to help you.
In case you did find the solution, let’s keep going.
Step 6: Set the right property
- Play around with the value of the property (either you created a new rule, or you’re editing an existing one) until the element is styled exactly like you want,
- If you created a new rule by clicking “+” before, it might have moved down inside DevTools, so look for it first
You can increase pixels (e.g. 0px to 100px ), click on the color box to open the color picker and try different things, scroll through the different properties in the autocomplete.
In this case, I’ll keep the background-color to red .
Now that you have the right rule / block with the right property and value, let’s proceed.
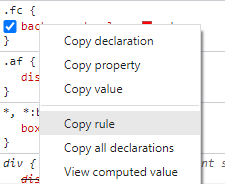
Step 7: Copy the rule
- Right click inside the block,
- Click “Copy rule”
Step 8 (optional): If the block happens to have extra properties, other than the one you created or edited, delete them
- Paste the rule in a text editor,
- Delete any other properties other than the one that interests you,
- Copy the result from there
In this step, we should remove any irrelevant properties copied over. A simple Notepad will do:
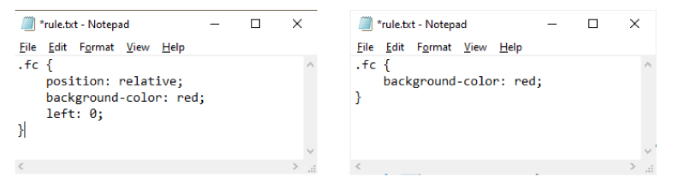
The code that we will add to the site will inherit the other properties, so no worries, they are not lost.
Skip this step entirely if the block has only the property you added or edited.
Step 9: Search how to add custom CSS to your website on Google - we want to see where we’ll paste the copied rule
- Look for info on how to add custom CSS to your particular site,
- Open the file or site editor
For example, if you’re using Shopify, you can look for “shopify how to add custom css”.
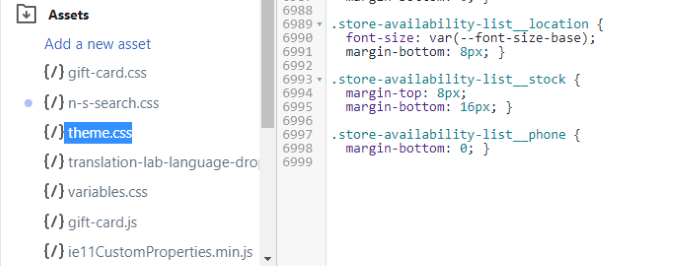
In Shopify, you’ll need to open your theme’s code editor (or a backup’s, to keep things safe until you’ve tested), and scroll to the bottom of theme.css or theme.scss.
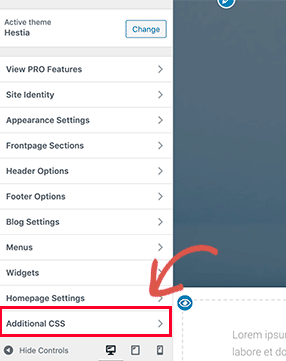
In WordPress, you can add code on the Theme Customizer, inside “Additional CSS”.
Step 10: Add the copied code
- Paste the new code where needed in your site,
- Save the editor or file,
- Go back to your website to make sure the change worked and didn’t conflict with other styles,
- If issues were caused or it didn’t work, delete the new code and save again
If all went well, then congratulations, you’ve made it!

Complications
As I said in the beginning, this guide will help with basic changes.
However, in more complicated situations, a lot could go wrong.
For example, your site’s CSS might have media queries which means that certain rules are applied on different screen widths.
This might mean that on a mobile screen you might not see the change you made on desktop, and vice versa.
Also, there could be !important flags on certain properties that could override your rules.
Another thing that could happen, is when changes you’ve made are also applied to undesired elements.
In that case, it might take a lot more work to figure out which selector to pick, and it might even be impossible without good knowledge of CSS.
Summary
Here’s the short version of what we did:
We opened up the DevTools to inspect the element to change. We tried to see if the style to change is already described, and directly alter the rule. If it wasn’t, we tried adding a new rule ourselves. In the case that the wrong element was chosen, we tried finding out other elements and trying the above steps. Finally, we copied the rule over to our website’s CSS editor of files.
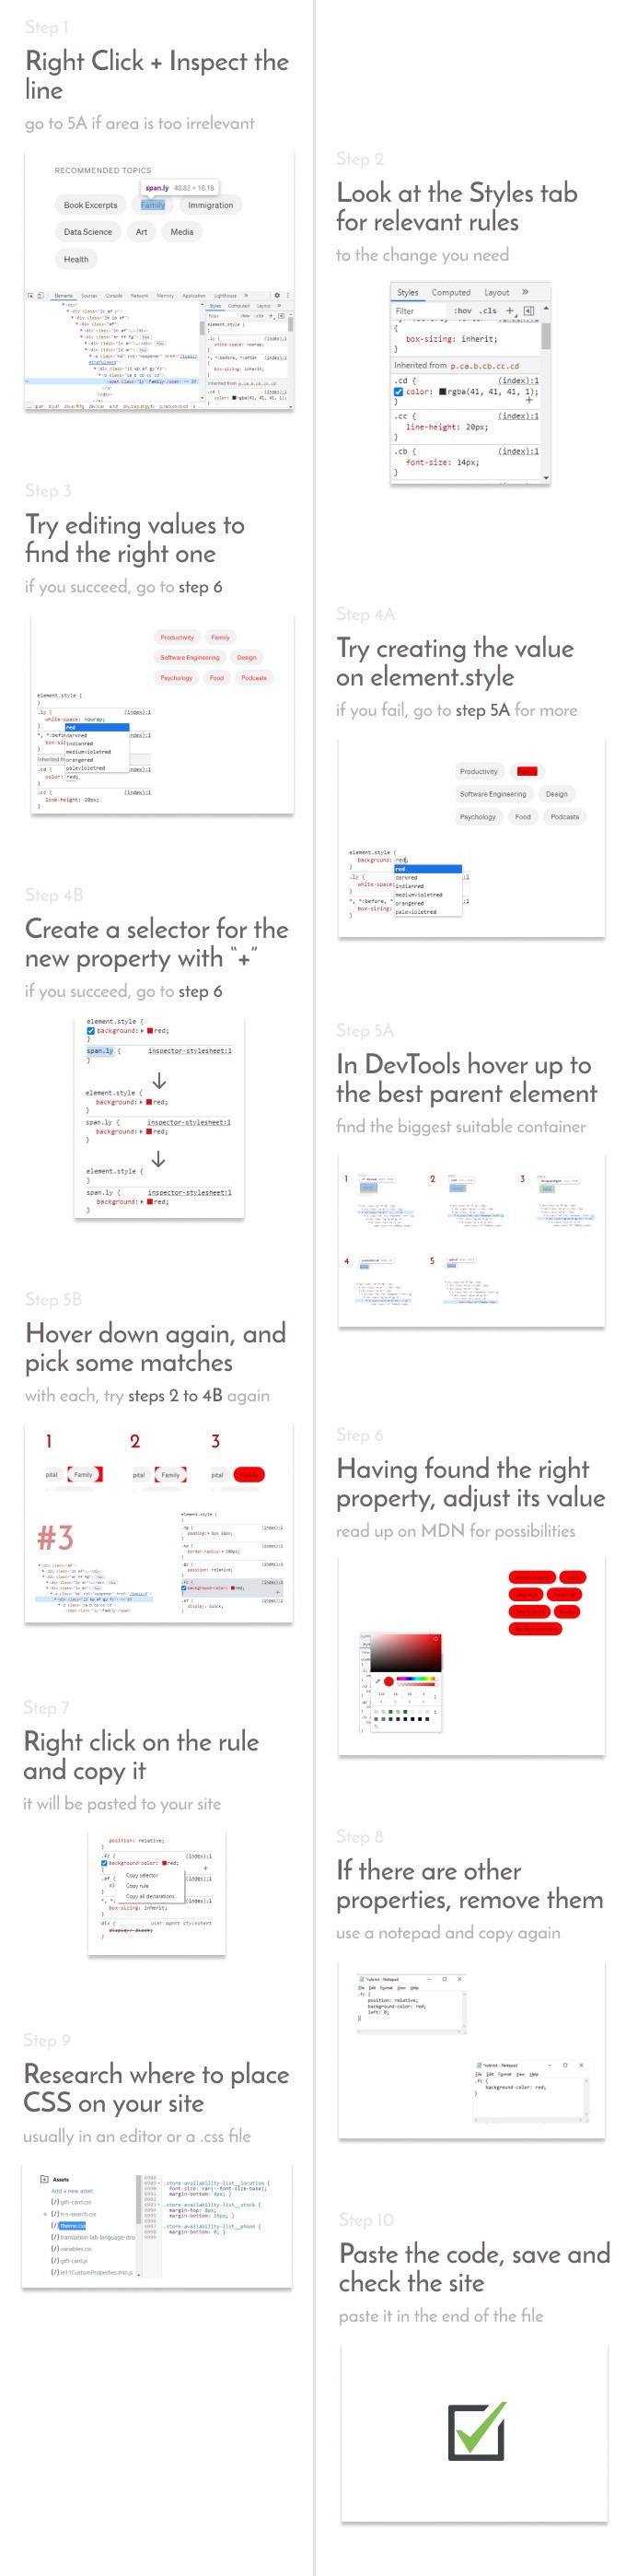
This is a visual recap of the steps:
Examples
Here’s how I hide the hero image on Microsoft’s website.
In the GIF, you’ll see that the initial element is not the one I want (setting display: none makes the entire area disappear).
So I move upwards all the way to a <div> and then as I look down, I find an <picture> element.
That’s where I see that there’s a display property already, and I set it to none . Success.
Here’s a much simpler example.
In Wikipedia, I inspect the title of the page and I am immediately presented with the right element and property (font-size) to change.
Conclusion
In this guide, I tried to balance chances of success with simplicity.
The scale leans towards the former, because if I made this another simple tutorial that makes too many assumptions, I’d rule out the majority of cases.
Either way, sometimes it’s really difficult to get the desired result, even for an experienced web developer.


